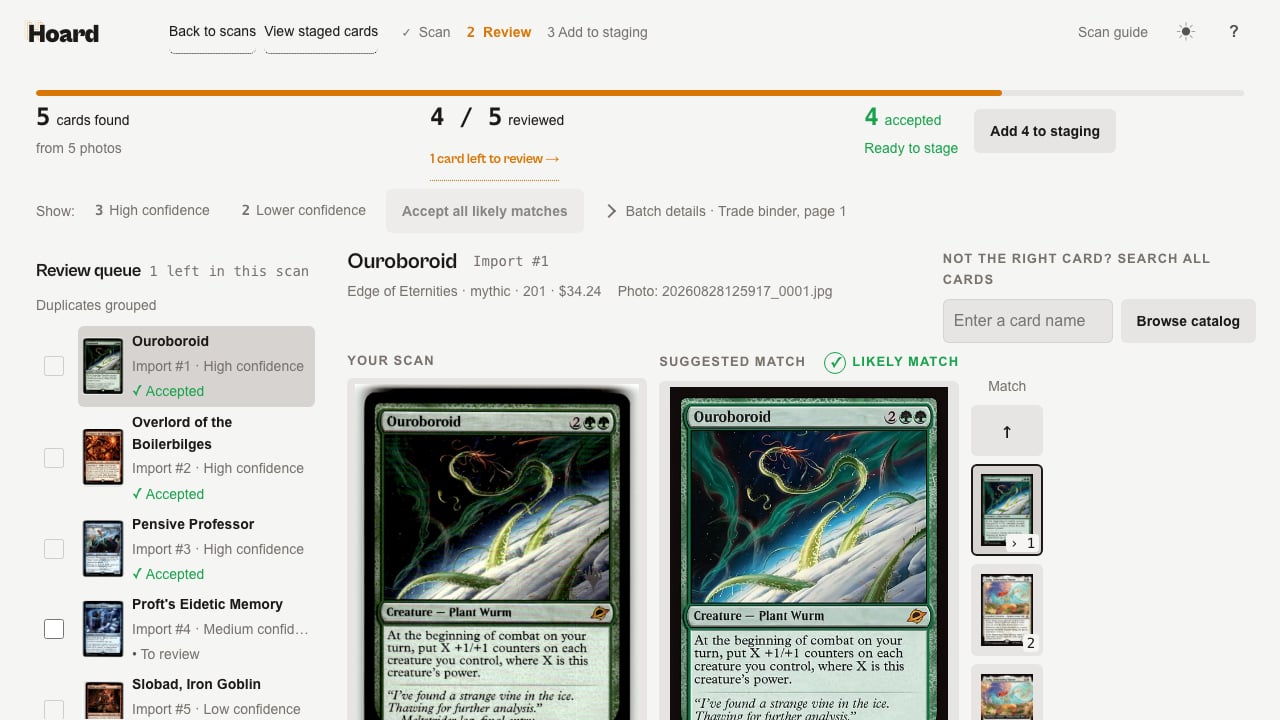
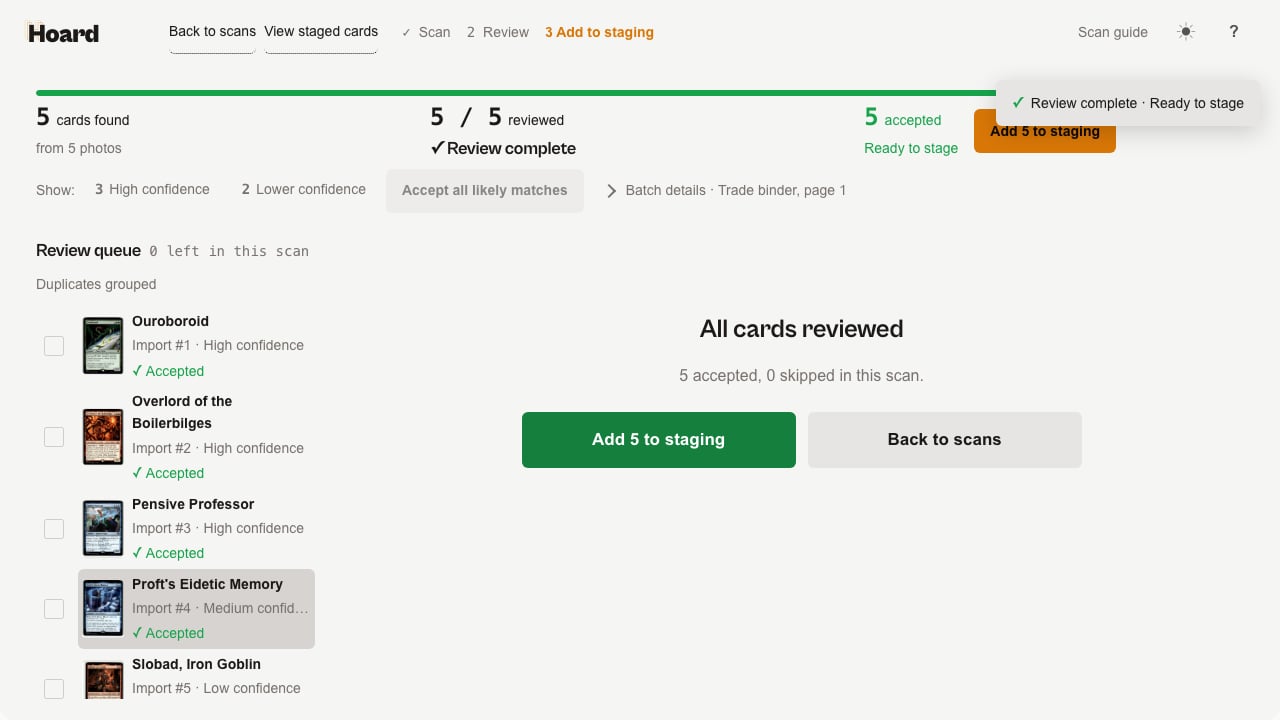
This tutorial walks a folder of card photos from upload to staging: preparing the import, letting it process, accepting the cards Hoard is confident about in one click, working the lower-confidence cards by hand, and staging what you accepted.

What you’ll end up with

  • A batch of scanned photos matched against your catalog
  • The high-confidence cards accepted in a single click
  • A couple of lower-confidence cards fixed with the Match strip and Browse catalog
  • Reviewed cards added to unpublished Hoard staging, with a receipt you can undo

Step 1: Prepare the import

Go to /collect and click Import scans. Give the batch a name you’ll recognize later, something like “Trade binder, page 1,” and add a note if it helps. Pick the game, then set a default condition, finish, and language for the folder.
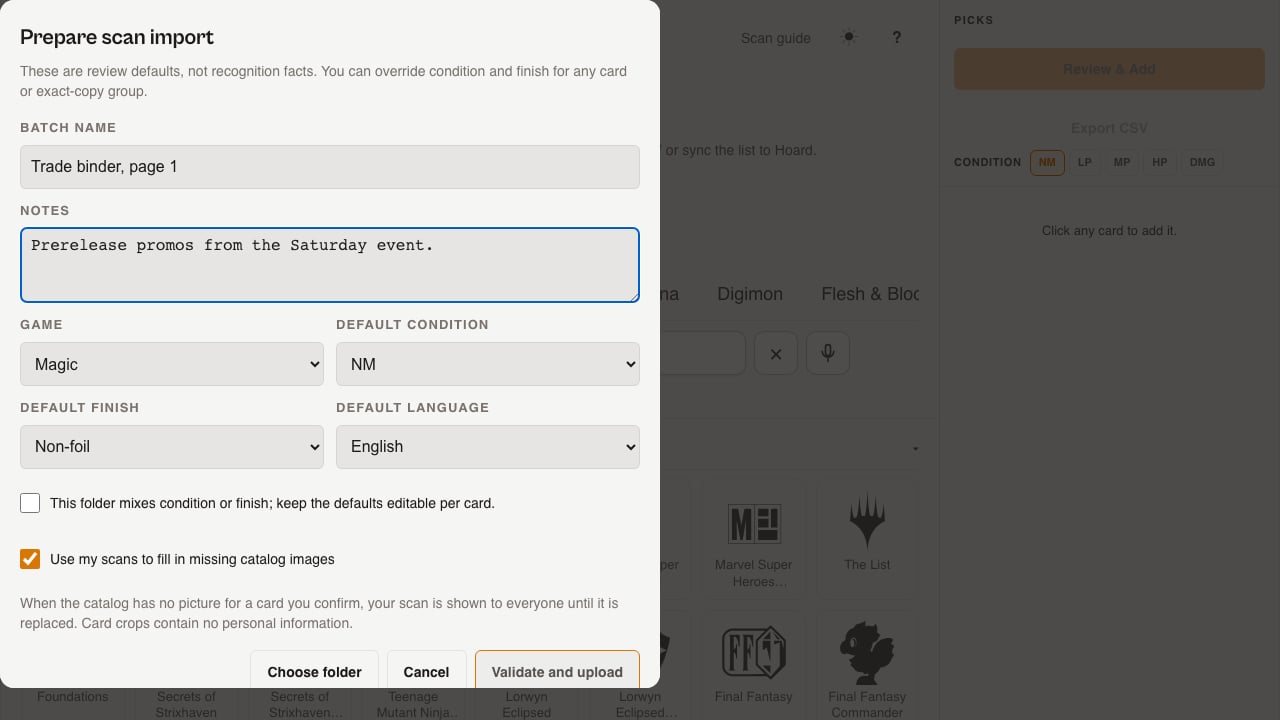
The Prepare scan import dialog filled in with a batch name, notes, game, condition, finish, and both checkboxes
If the folder mixes conditions or finishes, check “This folder mixes condition or finish; keep the defaults editable per card” so nothing gets stamped with a default that’s wrong for some of the cards. Leave “Use my scans to fill in missing catalog images” on unless you’d rather not contribute a photo when the catalog has no picture for a card you confirm. Click Choose folder, pick the folder of photos, then Validate and upload. Hoard checks file type, size, and resolution in your browser before anything uploads. Your photos go straight from your browser to storage; the Hoard server never sees the bytes.

Step 2: Let it process

For supported games, nothing needs to be installed: /collect shows “Processing your scans…” while Hoard matches your photos in the cloud. If you’re scanning a game that still needs your desktop agent and it isn’t running, /collect tells you so. Open Hoard Desktop and the batch picks up once it reconnects. Either way, you can close the tab. Processing continues in the background, and you can find the batch again from Your scans at /collect/scans whenever you’re ready. Once results start coming in, open the batch to reach the review page.

Step 3: Accept the likely matches in one click

The review page opens with a queue on the left and one card at a time on the right, its scan next to Hoard’s suggested printing. The filter row above the queue shows how many cards fall into each bucket, for example “3 High confidence · 2 Lower confidence.”
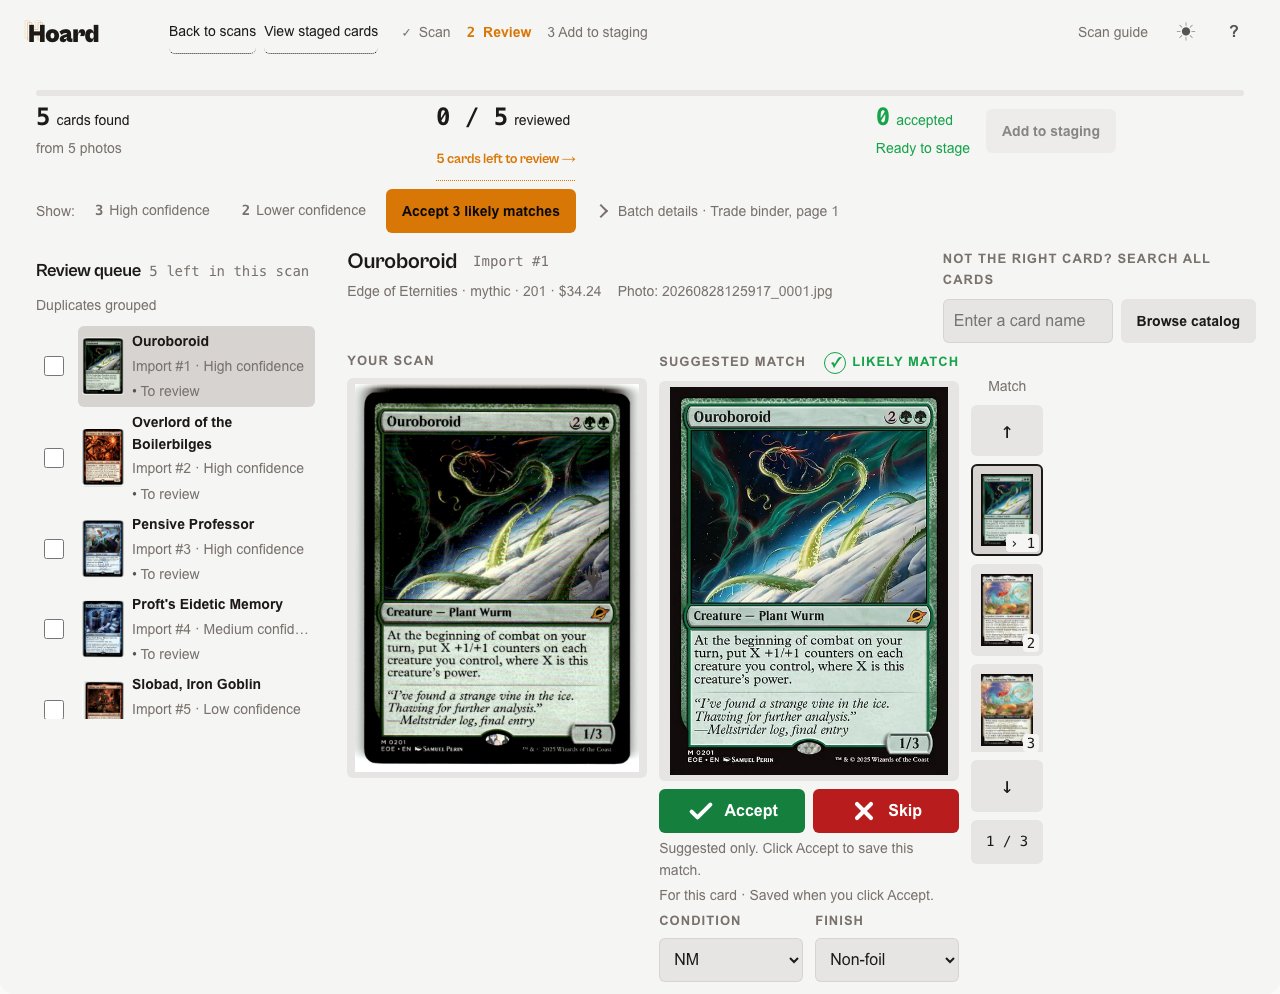
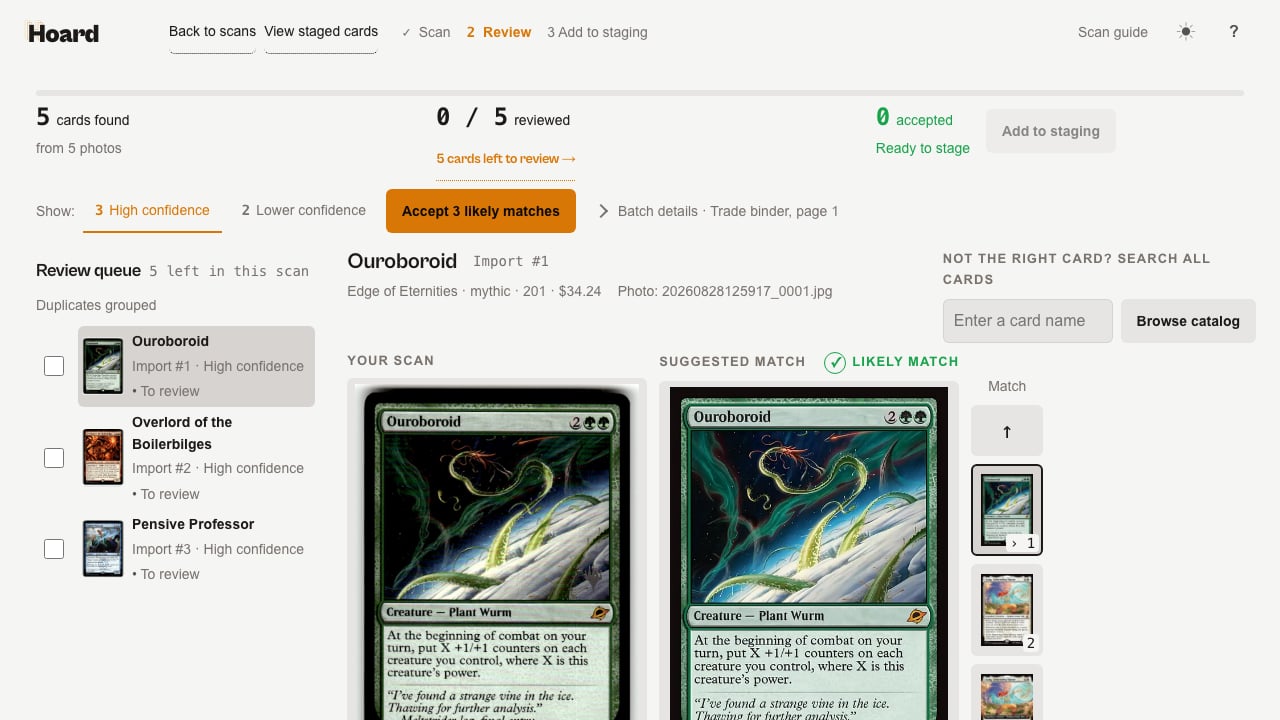
The review page mid-review, showing the queue, a card with a Likely match badge, the Match strip, and Browse catalog column
Click High confidence to filter the queue down to just the cards with a green ✓ LIKELY MATCH badge.
The High confidence filter active, with the queue showing only the three likely-match cards
You could accept these one at a time, but since Hoard is already confident about all of them, click Accept N likely matches instead. This accepts every eligible high-confidence card in the batch, the displayed candidate for each, in a single action. You can still open any of them individually afterward and change your mind before staging.
After accepting the likely matches, 4 of 5 cards reviewed, the queue showing three accepted rows and one still to review

Step 4: Work the lower-confidence cards

Switch the filter to Lower confidence, or just keep going; the queue moves to the next unresolved card either way. A card like this shows a rose ! LOW CONFIDENCE badge because the top candidate is a weak match, or nothing matched at all.
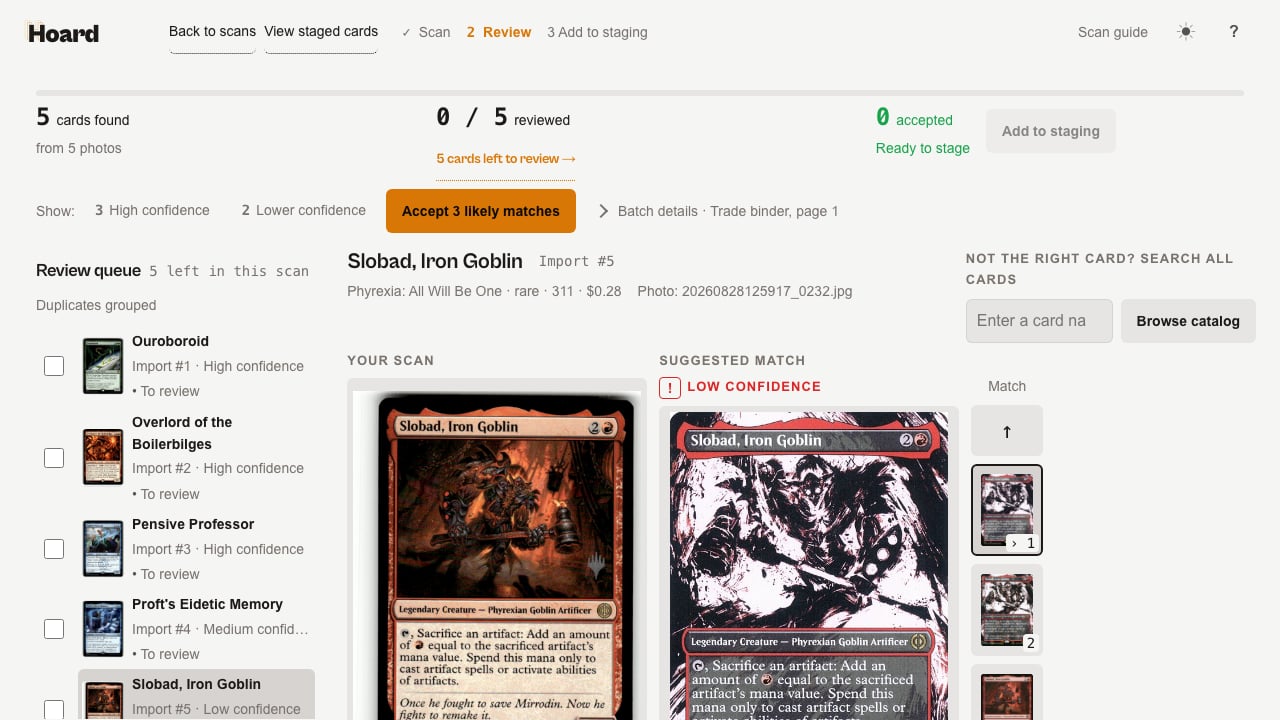
A card selected with a rose LOW CONFIDENCE badge, the suggested printing showing a different art, and the Match strip showing alternatives
Use the Match strip beside the suggested image to cycle through Hoard’s other candidates: click ↑ or ↓, or click a thumbnail directly. Each click just previews that candidate; nothing saves until you click Accept. If one of the alternates is actually your card, set the condition and finish and click Accept. If none of the candidates are right, use the “NOT THE RIGHT CARD? SEARCH ALL CARDS” box on the right for a quick name search. When that doesn’t turn up the printing either, click Browse catalog.
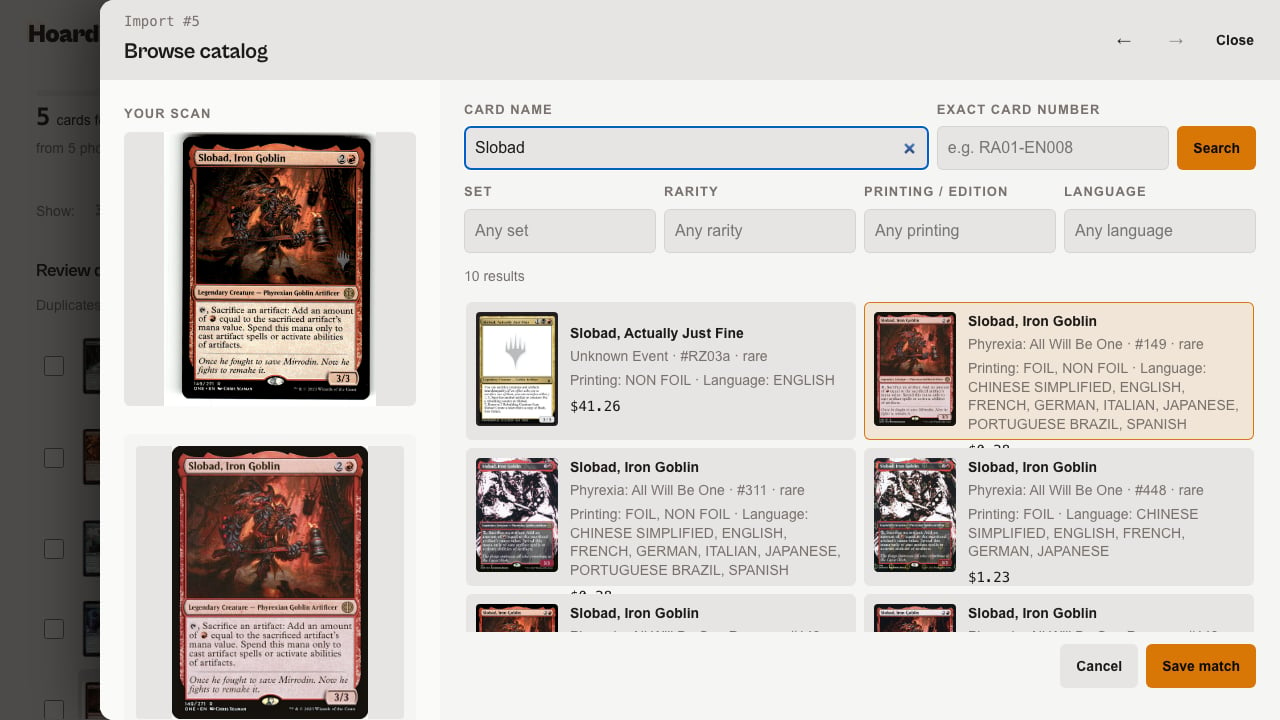
The Browse catalog inspector open for a scanned card, showing the scan, a results grid, and the selected printing
Browse catalog keeps your scan visible while you search the batch’s game by name or exact printed number, with set, rarity, printing, and language filters to narrow a crowded results grid. Selecting a result previews it, but it isn’t saved yet. Click Save match to accept that card immediately, or Cancel to leave the item unchanged. Arrows step you to the next scanned card without closing the inspector. Repeat for anything left in the queue. Once every card has a decision, the editor confirms it:
Review complete: 5 of 5 reviewed, editor showing 5 accepted, 0 skipped, with Add 5 to staging and Back to scans

Step 5: Add to staging and check the receipt

Accepting a card only saves your review decision, it doesn’t touch your inventory. Click Add N to staging (or Add 5 to staging if you accepted all five, as in this example) and confirm:
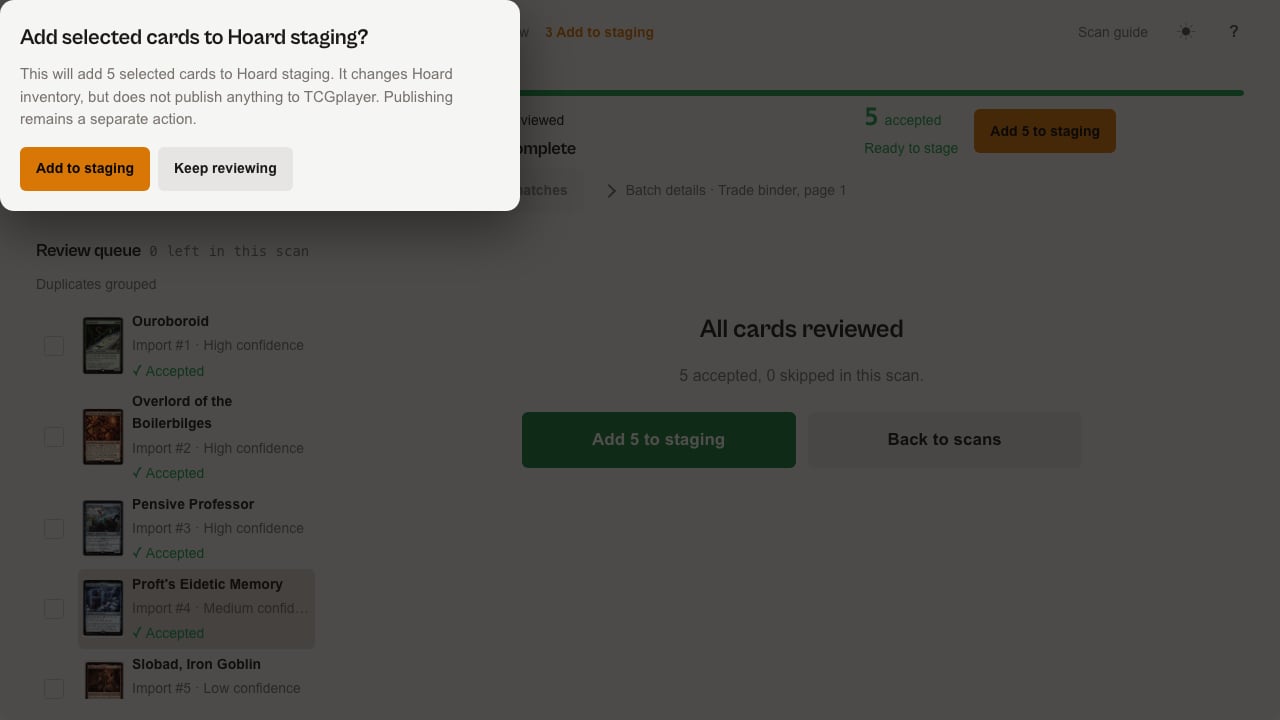
The Add selected cards to Hoard staging confirmation dialog
Choose Add to staging. Accepted cards become unpublished staged inventory priced with your current rules; anything skipped or left undecided stays out.
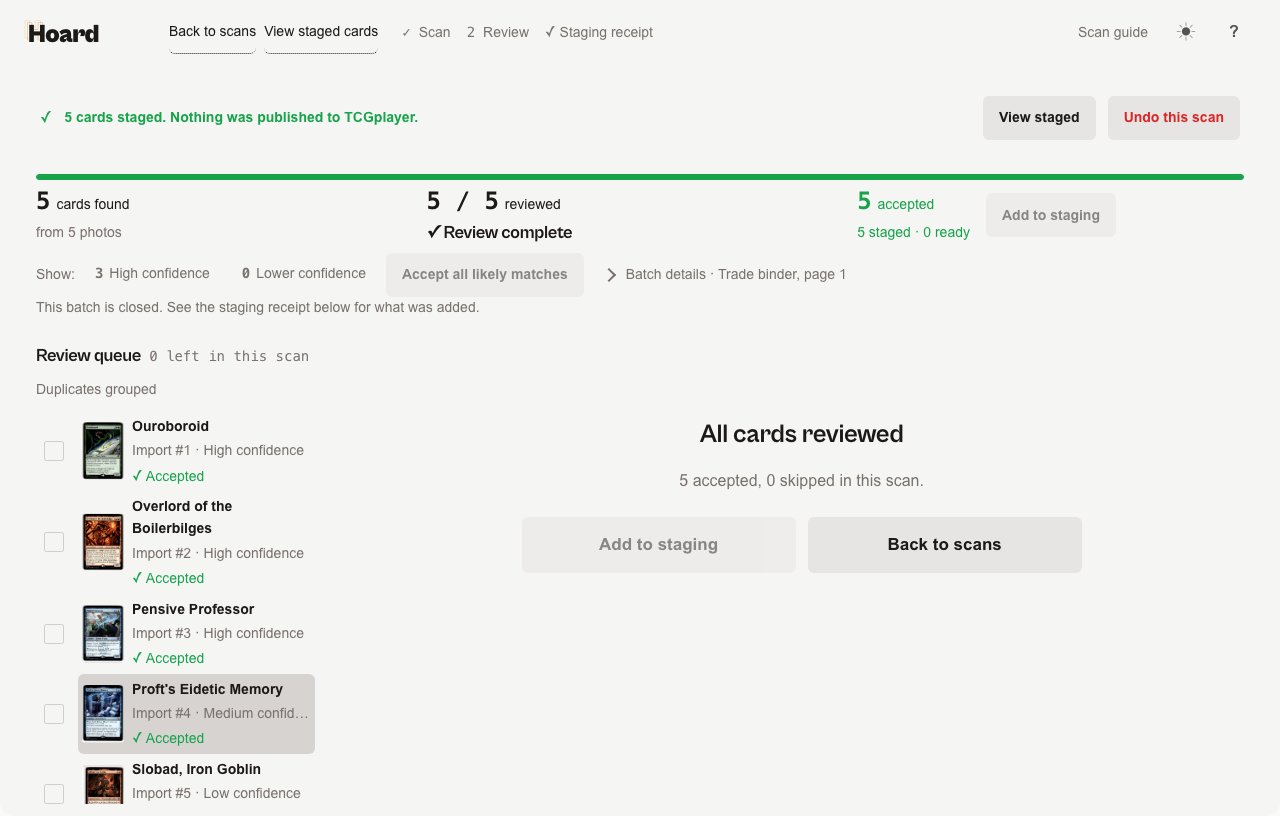
After staging, a green strip confirming cards staged with View staged and Undo this scan, and the header showing the staging receipt step
The green strip confirms “N cards staged. Nothing was published to TCGplayer.” Publishing to TCGplayer is always a separate step you take later. Click View staged to inspect exactly what was added. If this was a test batch or you staged the wrong scan, click Undo this scan. It reverses everything this scan staged, as long as none of those rows has since been edited, published, or used elsewhere in Hoard. If even one row has moved on, undo is refused for the whole batch.

Tips

  • A card with no candidates at all isn’t necessarily wrong. It usually means the catalog doesn’t have a published match for that game yet, or the photo didn’t segment cleanly. Manual search and Browse catalog still work with zero suggested candidates.
  • Space cards out when photographing a flatbed of several at once. Cards that touch or overlap in the same photo can get missed as a group.
  • Your progress is saved. Close the tab mid-review and reopen the batch from Your scans later without losing anything you’ve accepted.