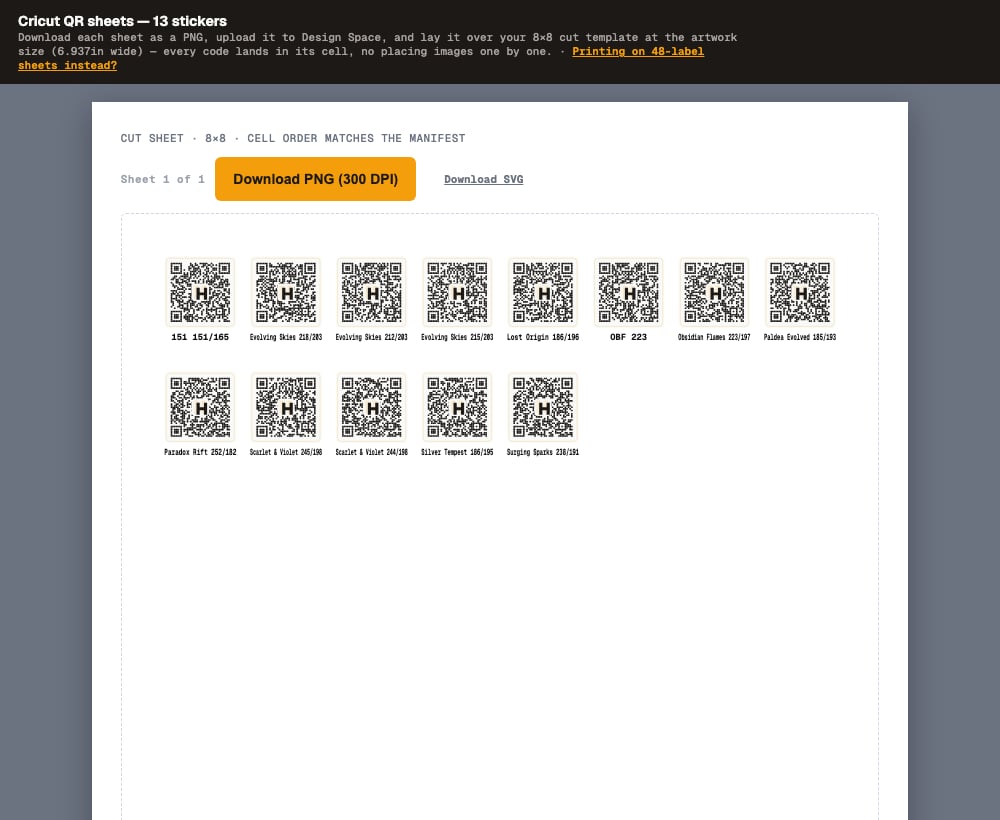
Step 1: Open the print sheet
Go to Settings → Public binder tab → “QR price stickers” and click Open print sheet. That prints your whole active inventory. If you only want stickers for a specific set of cards, start from the Cards tab instead: filter the table down to what you want (a set, a search, your high-value cards), then open the print sheet from the Export panel. The sheet then carries exactly those cards, in the order they’re shown. Either way there’s a cap of about 200 labels per run, so filter or batch if you’ve got more than that.Step 2: Pick a style and print
The default sheet is a 6×8 grid of 48 true 1-inch square stamps, sized for off-the-shelf 1-inch square label sheets (Avery, Online-Labels, or a Dymo 30332). Each stamp shows the QR plus a one-line set-and-number identity so you can tell cards apart before you stick them. Load your label sheet and hit Print.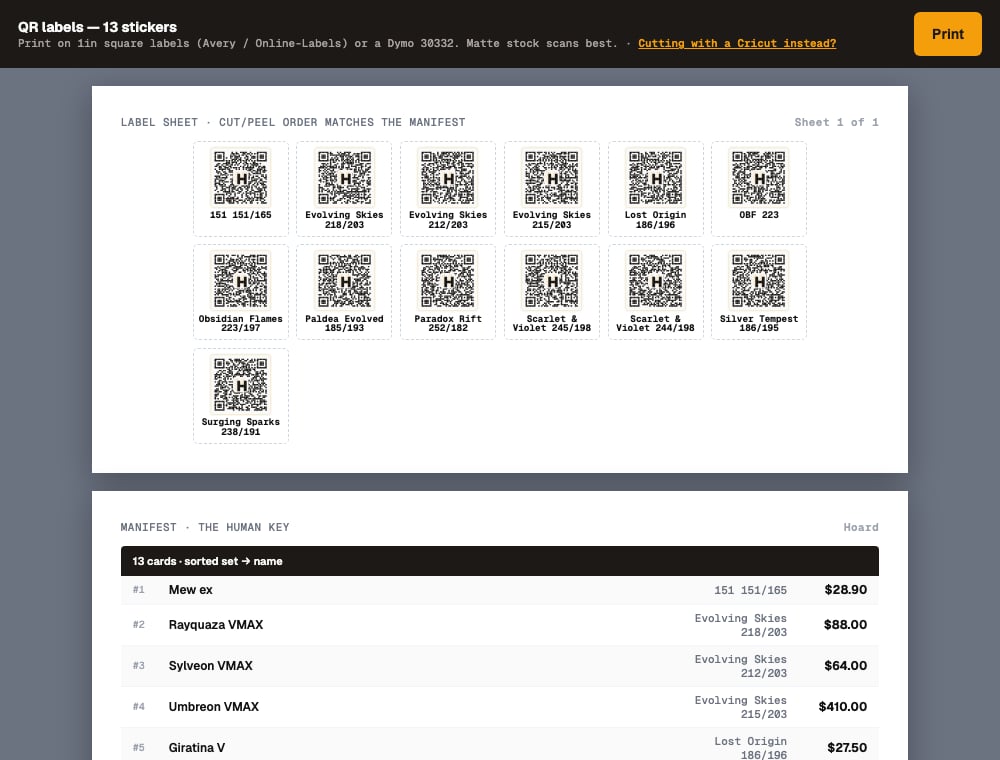
Step 3: Peel and stick
Peel a sticker and stick it on the card’s toploader or slab. Use the one-line identity on the stamp (and the manifest, if you’re matching a stack) to put each sticker on the right card. The sticker is tiny on purpose so it doesn’t cover the art. Once it’s stuck, you’re done with that card for good. These stickers you printed from your own inventory are bound to that one card forever, so there’s no peeling one off to move it to a different card later. When you reprice the card, run a sale on it, or move it to a different condition, the sticker keeps pointing at the same page and the page just reads your new numbers. No reprinting.Step 4: Scan one to see the live page
Pull out your phone and scan one of the stickers you just made. You land on the card’s live scan page: card art, the card’s name and identity, condition and quantity chips, and a “synced N ago” line telling you how fresh the price is.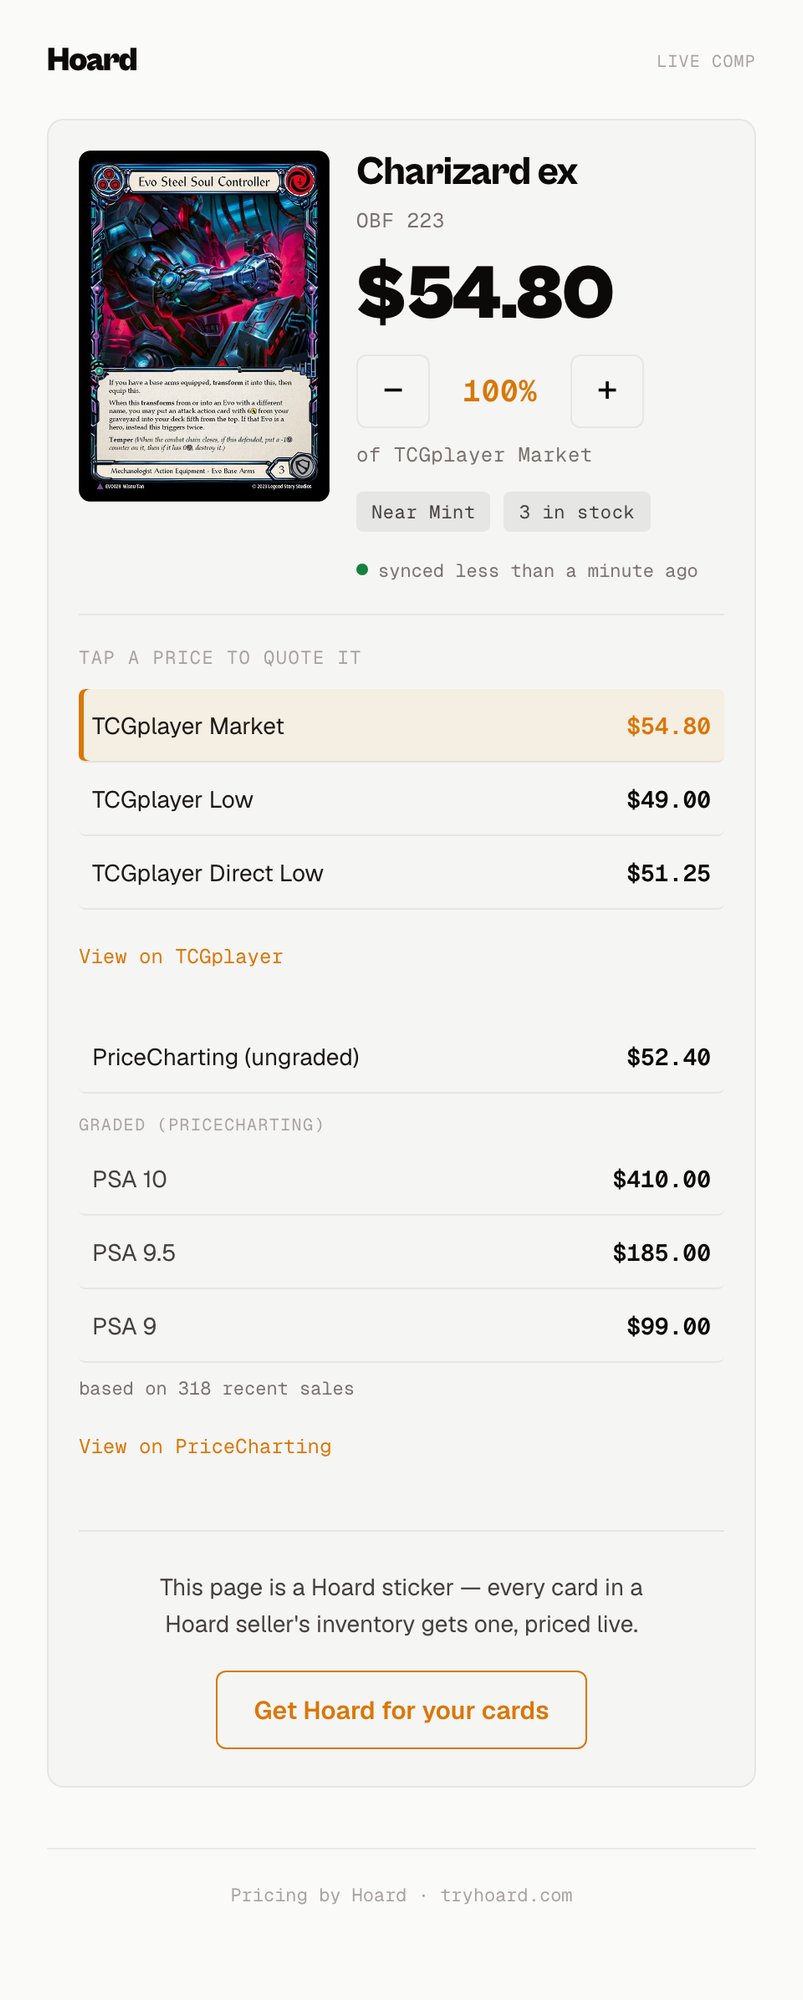
Step 5: Quote a price with the haggle dial
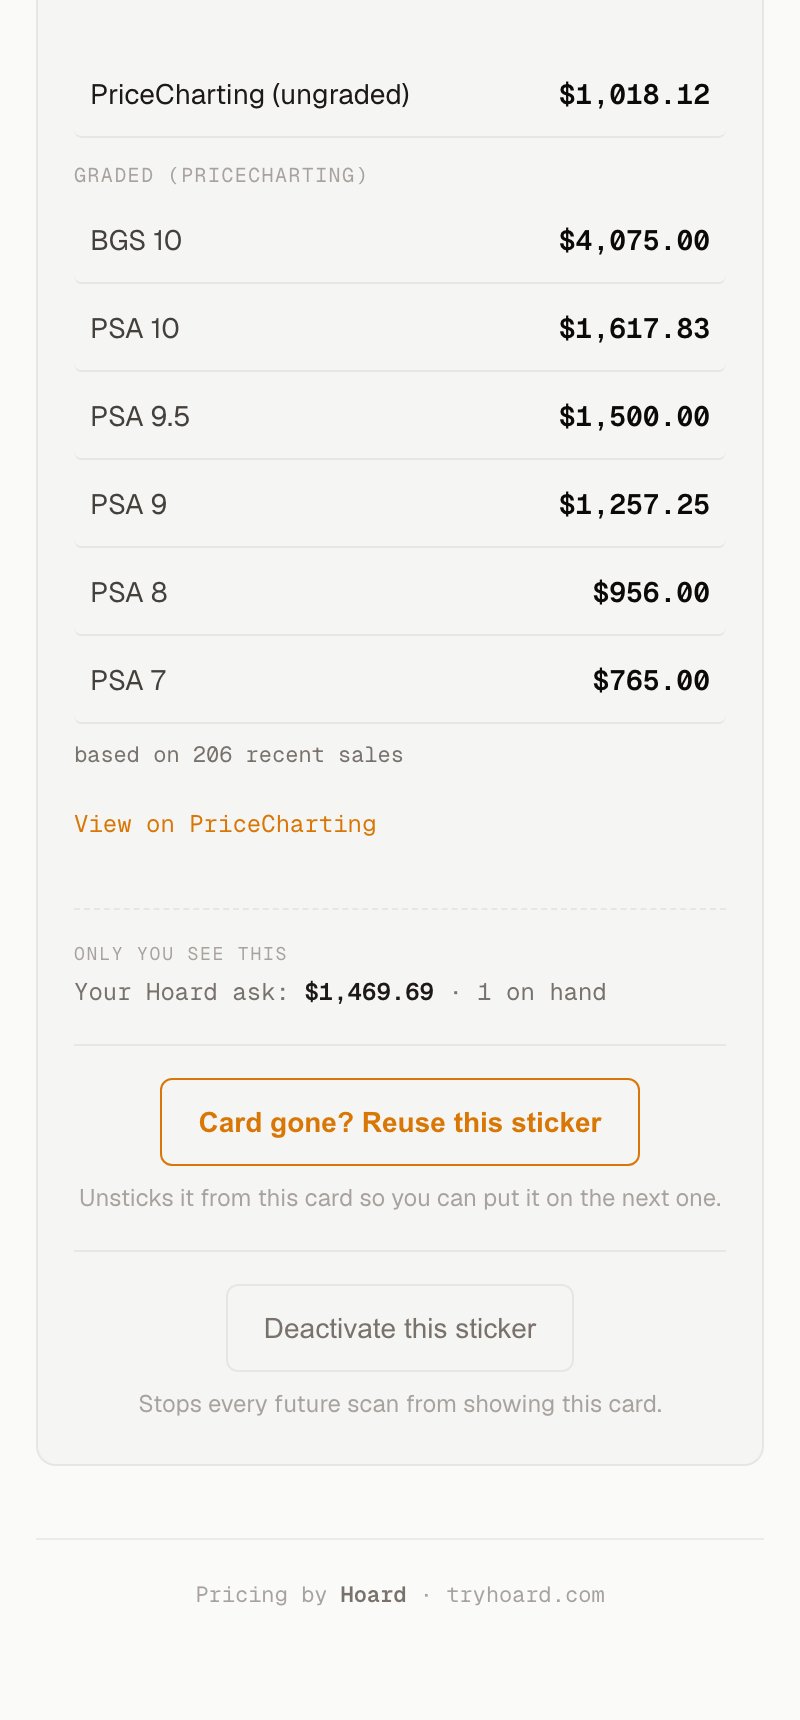
The big number at the top is the haggle dial: a market price with an adjustable percentage next to it. Tap − and + to step it from 25% to 200%. Want to quote 85% of market? Step it down to 85% and say the number it shows. The buyer never sees your own ask, just the figure you choose to quote. To quote off a different comp, tap one of the prices in the list. Tap Low and the dial re-bases on TCGplayer Low, relabels itself “of Low,” and recomputes at your current percentage. The row you’re quoting off highlights amber. The TCGplayer rows, the PriceCharting ungraded row, and (for graded Pokemon) each PSA/BGS grade line are all tappable, each grade on its own line so you’re never quoting off a blended number. Need to double-check the source? Tap View on TCGplayer and you land on the exact product and variant, not a search you’d have to dig through.Step 6: Preview a card with View QR page
You don’t have to print a sticker to see its scan page. Go to any card’s detail panel, find the QR sticker row, and click View QR page. Hoard opens that card’s scan page exactly as a buyer would see it, minting the code on the spot if you’ve never printed it. Use this to sanity-check a card’s comps before you commit a sheet to paper, or to jump straight from a card in your dashboard to its sticker page.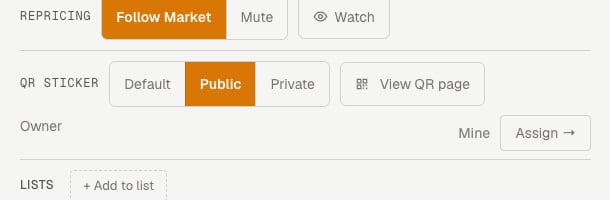
Step 7 (optional): open one card or lock another
By default your stickers are private, so a stranger who scans one hits a sign-in wall and sees nothing. To open everything up, flip Public stickers on under Settings → Public binder. More often you’ll want to open just one card. On that same card detail panel, use the Default / Public / Private control:- Set a chase card to Public to open it while the rest of your inventory stays private.
- Set a card to Private to lock it even when your account default is public.
Step 8 (blank stickers only): reuse one when the card sells
If you’re working with a blank claimable sticker (one you scanned and claimed, not one you printed from your inventory), you can put it back to work after the card sells. The stickers you printed in Step 2 are bound to one card forever and can’t be reassigned; this step is for the reusable pool codes only. Scan the blank sticker on the sold card. You’ll see an owner view at the bottom with a Card gone? Reuse this sticker button. Tap it. That unsticks the code from the sold card and drops you back into the assign flow, where you scope to a list, search, and tap the next card to put it on. The same physical sticker now rides the next card. Between the two, anyone who scans sees the private wall, never the old sold card, so the hand-off is always clean and deliberate.